Pulished on Oct. 17, 2018
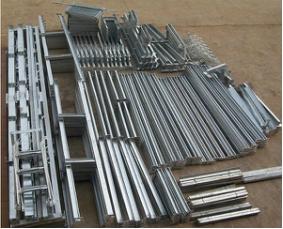
Cooling tower component production process:
Cutting---Correction---Assemble---Welding---Polishing---Correction---Drilling---Test---Galvanized steel---Polishing---Corrective repair---Numbering---Test---Warehousing
Parts production process:
Cutting---Deburring---Punching---Burr---Assembly---Welding---Correction---Test---Warehousing
① Cutting
When all materials are fed, the material specifications and dimensions should be verified to meet the design requirements, and the material acceptance report should be filled out carefully. After the check is correct, the material can be blanked.
The cutting should be carried out strictly according to the size of the drawing paper. For general steel, the length tolerance is ±0.5mm; the accessories, the length deviation is ±0.5mm.After the blanking, the component code must be marked and sorted and placed neatly.
② Correction
Manual or mechanical correction of bent and deformed raw materials must be performed prior to assembly;
After all the accessories are cut or the holes are made, the burrs must be removed before they can flow into the assembly process;
Qualified parts are sorted neatly by box and marked with a label.
④ Assemble
In order to reduce the welding deformation, the steel fixing method is adopted in assembling, that is, positioning in the fixture;
Manufacture different fixtures according to the size, angle, etc. of different components;
When assembling, the spot welding position is as close as possible to the four rounded corners of the section steel,the parts are welded at the contact surfaces of the two ends;
When assembling spot welding, it is not allowed to directly lead the arc on the fixture or component;
When connecting with screw holes, all connecting parts must be equipped with gaskets unless otherwise specified.Try to avoid using long holes.
⑤ Welding---Polishing
Before welding, the oxide, rust and grease in the weld zone should be cleaned, and the welding slag should be cleaned with a sharp-angled hammer,the welding of the channel steel and the plate is as far as possible inside the channel, and the fillet weld is 5mm.
It is not allowed to randomly arc on the base metal to prevent the arc from scratching the base material. It is best to use the arc striking plate to induce arcing.
When welding, it is necessary to observe the welding deformation dynamics and flexibly apply various welding methods: such as symmetrical welding, segmented back welding, and anti-deformation.
After welding, remove the welding slag and splash metal, and carry out self-inspection. If there are holes, cracks, incomplete welded, etc., it is necessary to repair the welding.
Schedule 1: Welding rod welding current parameter table:(E43)
Welding rod diameter(mm) | 2.5 | 3.2 | 4.0 | 5.0 |
Length (mm) | 300 | 350 | 400 | 400 |
Flat welding current(A) | 55~85 | 90~130 | 130~180 | 180~240 |
Vertical or horizontal welding(A) | 50~80 | 80~115 | 110~170 | 150~200 |
Schedule 2: CQ gas shielded welding wire,K—17LF1.2mm Welding specification (DCEN)
Welding diameter | Position of welding | Current(A) | Voltage(V) | Wire feed speed(mm/min) | Extend long(mm) | Gas flow(L/min) |
1.2 | Level | 100~140 | 25~34 | 3302 | 8~5 | 5~8 |
1.2 | Horizontal welding | 90~130 | 22~27 | 2778 | 8~5 | 5~8 |
1.2 | Vertical welding | 90~130 | 22~27 | 1778 | 8~5 | 5~8 |
1.2 | Overhead welding | 80~120 | 20~24 | 1270 | 8~5 | 5~8 |
Welding rod management:
The welding rod grade used for the cooling tower steel structure welding is E4303;
Since the welding rod coating is easy to absorb moisture, the following four items should be noted when using the welding rod:
1) The welding rod must be baked at 350 ° C for 1 hour before use, and then used at 100 ° C;
2) The removed welding rod should be placed in the constant temperature box and used as needed;
3) When the welding rod is placed at room temperature for more than 2 hours, it should be re-dried and continuously dried no more than three times.
Visual inspection
1)The appearance of the weld meets the national secondary weld standard of GB50205-2001;
2)Weld seam is continuous weld,he height of the soldering foot is 5~6mm;
3)The surface of the welding position needs to be evenly ground, without welding slag, no oil stains, and the galvanized process vents with a diameter of 6-8mm at both ends of the cavity member.
⑥ Correction
1)According to the technical requirements stipulated in the drawings, the components after welding must meet the manufacturing requirements before they can be accepted;
2)After galvanization of the external dimensions and aperture dimensions, the tolerance of the fit size is ±2mm, the tolerance of the non-fitted dimension is ±5mm, and the linear error is <0.3%;
3)No cracks in the parts, the welding surface is neat, smooth and burr-free after grinding
⑦ Galvanized stee---Correction---Repair---Warehousing
Uniform, smooth, non-defective galvanized layer.
Galvanizing thickness requirements refer to BS EN ISO 14516:1999 standard:
Workpiece thickness | Local measurement minimum thickness (Um) | Standard minimum average thickness(um) |
Steel thickness 6 mm or more | 70 | 85 |
Steel thickness greater than 3 mm less than 6 mm | 55 | 70 |
Steel thickness greater than 1.5 mm and less than 3 mm | 45 | 55 |
Steel thickness less than 1.5 mm | 35 | 45 |
Polish, repair and calibrate the finshed product after galvanizing,organize and categorize qualified products, then warehousing or shipment;rework or dispose of unqualified products according to the prescribed procedures.

Copyright © Guangdong Feiyang Group Industrial Co., Ltd.
All Rights Reserved | Sitemap
Technical Support: 